I really like making cheesecake. It's really easy to do since all you have to do in the least fancy version of it is to smash up some sweet biscuits, combine it with butter and bake/press it down. Combine sugar and cream cheese, blob it on top with some kind of fruit and voile done. You can make things fancier if you want by adding other things, but at the heart of it, that's your basic cheesecake.
I'm partial to a baked cheesecake myself, with the whole lactose intolerance thing I don't get quite as sick and I prefer the difference in the texture more, like a baked custard or something as opposed to a smudgy gel. They also take a lot more baking skill to put off since they often require a water bath and hours of careful low temperature baking to ensure they have a smooth, uncracked top.
I used to make them quite a bit when I was studying, which is odd as cream cheese is STILL crazy expensive now that I have a job. Let me start by saying, the oven at my sister's is a piece of shit. It overheats by, 10-20C, we checked with the candy thermometer I got off EBay. As a result, we had a lot of fallen in cakes, flat muffin tops, slightly burnt biscuits and slices when we left it in there a few extra minutes and all other sorts of mishaps. We quickly learnt to not trust recipe cooking times with that being said, we always had to lower the temperature and add on extra time.
With that being said, the current oven I have is a dream. A perfect fan forced delight, the only issue I have is that the racks that come with the oven are quite hard to get out when there is something heavy on top. I've never burnt anything, the 180C is a perfect 180 and its lovely. However, I was unable to make a baked cheesecake perfectly in this oven on my first try. This is what it looked like.
 |
| It looks like a picture of the moon |
I frantically researched how I could possibly prevent this hideous cracking. Cheesecake lore is vast and very much insistent of the same things. Use a water bath to ensure an even temperature as the eggs help it set and whites and yolks cook at different temperatures, don't over mix your eggs into your batter as they can hide air pockets and cool it in a draft free place so that it doesn't crack whilst cooling. Simple. I had a mental blank however on how to make my springform tin waterproof, basically just wrap aluminum foil around it in a snug layer.
I'm a little impatient so I often overbake mine just a little bit so they go slightly golden brown and I can eat it faster. Its entirely up to you how the texture of your cake turns out. I actually prefer the texture of that cracked cheesecake, the insulated water one is very smooth and creamy but without the tang that unbaked ones have. I'm including the recipe for my unbaked version of the same, its basically the same thing without the eggs and with gelatine.
There is a lot of contrary advice here, especially for the marbling technique. I normally don't use the traditional technique for marble cake, where you try and make alternating blobs of two differently coloured mixtures in the pan, going around and around until the pan is full before swirling.
This a nice video that explains what I'm talking about. I normally can't be bothered and just blob it in halves and get my Boyfriend to swirl for me, he always does a very good job of it, more so when we have large amounts of curd to use. Choose whatever milky/creamy drink you have on hand to mix in, it lightens up the taste of the cake a lot and provides valuable bulking if you're cheap with the cream cheese like I am.
Baked Lime Curd Marbled Cheesecake
Uses: making others fat. Regaining your title as cheesecake queen.
Ingredients for the biscuit base:
250g of crushed sweet biscuits
100g of melted butter
Ingredients for the cake part:
375g block of Philadelphia cream cheese
3/4 cup of sugar
1 cup of cream/milk/soy milk
2 eggs, just combined
1/2 cup of lime curd
 |
| Its pretty much the same for both +/- eggs/gelatine |
Instructions:
1. Process your sweet biscuits in a food processor. If too lazy to wash, attempting to be healthy, cooking with a small child or masochistic, crush the packet by hand. Heat the oven to 180C.
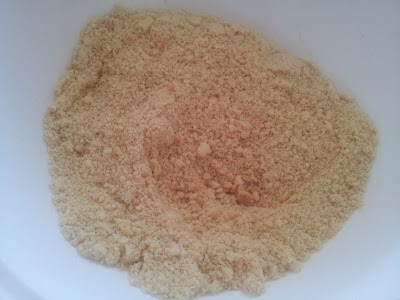 |
| Hand smooshed |
2. Melt your butter and combine with the biscuit crumbs. Take out all your cake stuff and allow it to come to room temperature. If in a rush, microwave your cream cheese for 15 seconds.
 |
| Buttery. |
 |
| Buttery crumbs! |
3. Wrap the outside of a 22cm springform tin with aluminum foil and place the butter/biscuit mix inside this. Crush firmly down and against the sides of the tin with a glass tumbler to get an even coat. If feeling lazy, just squish against the bottom.
 |
| Like so |
4. Bake in the oven for at least 8-10 minutes or until lightly golden brown. Allow to cool while making the cheesecake part. Turn the oven down to 160C.
5. Process the sugar and cream cheese together until smooth or smoosh by hand with a fork.
 |
| I really hate washing baking stuff. |
6. Mix in the milk/cream/soy milk.
 |
| Creamy blobs. |
7. Carefully fold in your eggs. Do not overmix or bad things will happen.
 |
| It looks like an evil smiley face. |
8. Pour half of the cream cheese mixture into your cool biscuit mixture in the springform tin. Blob on your lime curd everywhere, or just spread a layer over the cream cheese. Pour over the other half. If you can be bothered, blob in a blob of cream cheese, then curd and repeat until the entire mixtures are used up.
9. With a poking instrument ie, knife, chopstick, fork, swirl a pattern through the mixture until pretty. Use restraint and do minimal swirls, otherwise you will just be mixing the curd in.
 |
| Bit too much |
 |
| Pretty swirly pattern |
10. Put your cheesecake in a deep roasting tray, fill the tray with water until the cheesecake is just about to float.
11. Bake at 160C for at least an hour. Do not open the oven until you think its ready. The centre should jiggle merrily, or alarmingly like a raw cake just in the centre. Allow to cool somewhere until set, it will firm up later on.
Unbaked Lime Curd Marbled Cheesecake
Uses: making others fat. Regaining your title as cheesecake queen.
Ingredients for the biscuit base:
250g of crushed sweet biscuits
100g of melted butter
Ingredients for the cake part:
375g block of Philadelphia cream cheese
3/4 cup of sugar
1 cup of cream/milk/soy milk
1 tablespoon of gelatine mixed in hot water
1/2 cup of lime curd
Instructions:
1.
Process your sweet biscuits in a food processor. If too lazy to wash,
attempting to be healthy, cooking with a small child or masochistic, crush the packet by hand.
2.
Melt your butter and combine with the biscuit crumbs. Take out all your
cake stuff and allow it to come to room temperature. If in a rush,
microwave your cream cheese for 15 seconds.
3. Wrap the
outside of a 22cm springform tin with aluminum foil and place the
butter/biscuit mix inside this. Crush firmly down and against the sides
of the tin with a glass tumbler to get an even coat. If feeling lazy,
just squish against the bottom.
4.Put the biscuits in the fridge to set.
5. Process the sugar and cream cheese together until smooth. Mix up some hot water with the gelatine.
6. Mix in the milk/cream/soy milk.
7. Mix in your gelatine water, do not let this gelatine water be super hot or super cold. Super hot makes jelly strands, super cold means jellied water.
8.
Pour half of the cream cheese mixture into your cool biscuit mixture in
the springform tin. Blob on your lime curd everywhere, or just spread a
layer over the cream cheese. Pour over the other half. If you can be bothered, blob in a blob of cream cheese, then curd and repeat until the entire mixtures are used up.
9. With a poking instrument ie, knife, chopstick, fork, swirl a pattern through the mixture until pretty. Use restraint and do minimal swirls, otherwise you will just be mixing the curd in.
 |
| Haha, there was a different picture |
10. Come back in 2-3 hours and wobble to see if set. If set, eat.


