Showing posts with label Recipe. Show all posts

Sunday, 26 October 2014

Viet style sticky ribs

Every now and again, I get obsessed with making something and this time it was sticky, slow cooked ribs. It coincided nicely with the factor that my butcher was selling Angus ribs for $3/kg. I based the recipe off this one from Not Quite Nigella. I added a few other bits and pieces to the recipe, mostly I've added cinnamon and more star anise so it smells more like pho!

I've made this recipe many, many times over the last few weeks. In total five times at the time of writing. Ribs night is now a big deal at work because news has spread that I do bloody good ribs. Manda and Dani,, both say that they would either marry me or request it as their last meal. I also spam my Instagram with pictures of my ribs in various states of cooking.

I usually can only afford super cheap ribs, they're not the American style ribs you imagine when you get ribs. These are literally chunks of meat, fat and gristle with a bit of bone shoved it, as you imagine its still pretty delicious but its not real rib meat. One day I'll get real ribs, but for now, cheapo $3 ribs are much better than $20/kg ribs.

For marinade times, the minimal is about two hours and the longest time I've ever done it is over two days. Basically the more you want it to be delicious, the more effort you put in. Every hour give the box a shake, or mix the pieces around. Otherwise do the easy marinade option, two hours, flip the box, another two hours, flip again. If you are efficient, flat packed bags are great or I just put my ribs in my largest cake container and shake like a maniac every time I open the fridge. That's the kind of love I have for my food.

Ingredients:
2-3kg of beef ribs,
1 cup of dark soy sauce
1 cup of soy sauce
1 cup of brown sugar
2 large limes/lemons juice, and rinds thrown into the marinade
6 cloves of garlic, skins removed and smashed
7 pieces of star anise
1 large piece of cinnamon bark
2 inches worth of ginger
1 large onion, cut in half
Water to top!
A large 6L slow cooker!

Optional:
As many hot red chilies as you can stand
1 tablespoon of sesame oil
1 tablespoon of rice wine
Extra 1 cup of sugar for sauce


Sans optional ingredients
1. Make the marinade. Literally mix everything up, dissolve the brown sugar in the sauces, smash up your garlic, cut your onion in half, squeeze your limes/lemons and give it a good mix.


2. Put your ribs on top. Marinade for as long as you can stand.

Yay!

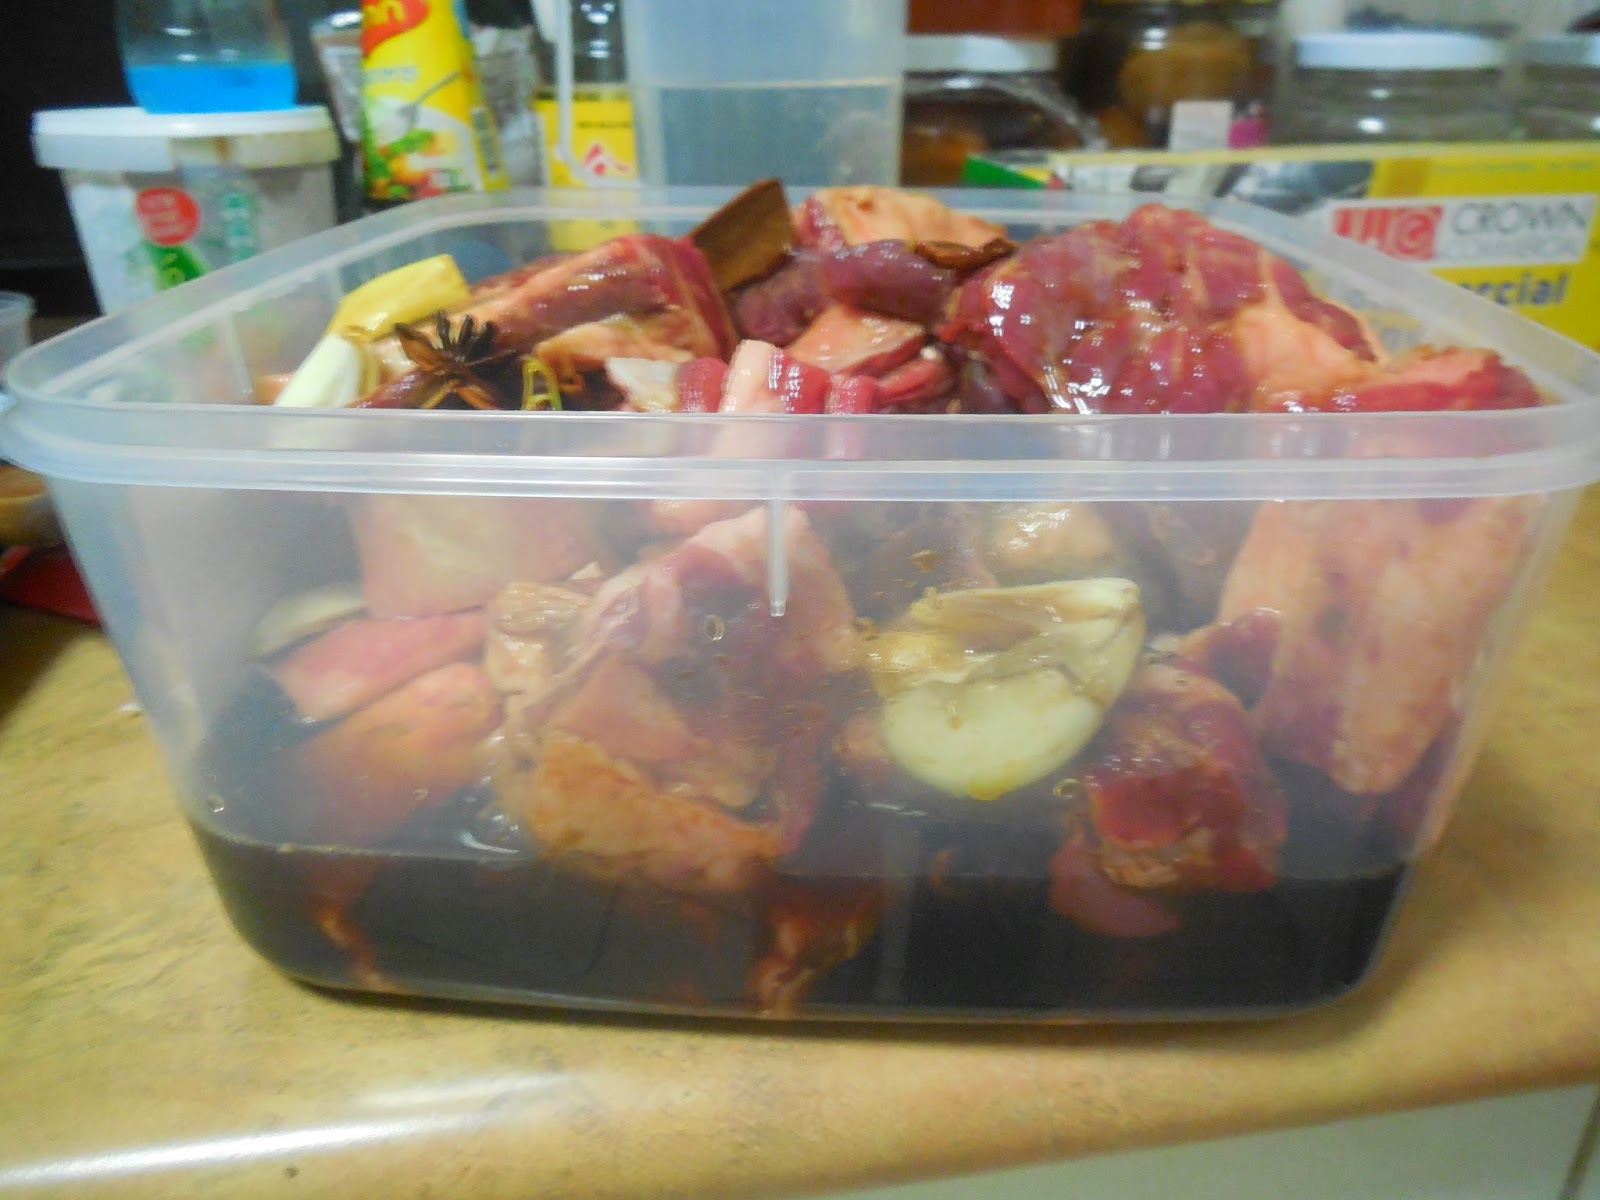
You can top up with water if you want to be lazy
3. Separate your sauce and spices into your slow cooker. Seal off the ribs if you want, or don't. It just adds more colour to it.

So pretty
4. Chuck everything into your slow cooker, the ribs, spices, marinade and put in extra water or the leftover sauce from the last time you made ribs. Just remove the lemon/lime halves. Cook for either four hours on high or eight hours on low.


5. Allow to cool overnight if desired so the fat is easier to scoop off. Separate the meat and the sauce.

6. Boil one cup of the sauce down with a cup of brown sugar to make a sticky glaze you can coat the meat in and serve with whatever you want. Favourites of the girls at work include cheap Woolies/Coles brand pasta/potato salad, a fresh salad, good bread and butter, steamed white rice and potato bakes.

Monday, 19 May 2014

Baked brie with red wine and garlic

I first got the idea for this baked brie from watching an episode of Masterchef. It was one of the later seasons, the one where Adam and Callum were the finalists. There was a gourmet cheese master class that had a fancy British guy teaching the recipe for this. I watched eagerly, I saw the gooey strands of cheese and the crusty bread that went with it. I thought to myself, I can do that. The brainchild of many an attempted recipe.

I make this in many, many different ways but the basic recipe remains the same.  Soft cheese, red wine, garlic and whatever herbs you have. I've use rosemary, dill, thyme, lemon thyme and whatever else you want. Blanch the garlic, poke lots of holes, shove the garlic in, top up with wine and then bake until gooey.

The soft cheese goes all gooey and liquidy, the garlic goes soft, sweet and mellow and oh god the smell of this is absolutely glorious. It is very easy and requires few ingredients, what else do you need?

Baked brie with red wine and garlic

Ingredients:
1 brie or Camembert, any size will do
1 clove of garlic
How water
Red wine
Enough snipped up herbs to sprinkle over the top

All you need is this~
1. Finely slice your garlic clove and blanch it in hot water for a minute. Drain and pat dry. Turn the oven onto 180C.

Blanch!
2. Stab lots a hole for each slice of garlic into the top of the cheese. If you want, you can slice off the rind at the top before doing this, but I normally keep it on.

Lots of slits!
3. Put a piece of garlic into each hole.


4. Splash some wine over the top of the cheese and allow the wine to soak in. Sprinkle the herbs on top if you're using any.


5. Bake the cheese in a ramekin/oven proof bowl/it's box until gooey and golden. Generally about 15-20 minutes at 180C.

Looks gross but its delicious.


6. Serve with crusty bread!


Saturday, 12 April 2014

Sour cream, banana and walnut bread

I hate bananas. I think this is well known. Sometimes I eat them but only when I need a fast whack of potassium and I don't feel like a sports drink is a good idea. I can moderately tolerate them as long as they are slightly under ripe and very firm. The slightest hint of an overripe smell turns me, VGirl and Mama Pham off.

Everyone knows what overripe banana mean! IT'S BAKING TIME.

Even I can appreciate a good banana cake. I decided to combine a few ideas based off this Donna Hay recipe. I thought sour cream is a wonderful idea as well as walnuts to add a bit of texture to the whole thing. So here we go with my sour cream, banana and walnut bread.

Its a very heavy, dense thing that is wonderfully moist from the first day. It lasted for a week on my kitchen bench, lightly covered with plastic wrap and it was as moist and flavour some on the first day as the seventh. I was still on holiday and didn't manage to finish it by myself. I bought a big chunk of it to my night shifts and it was gone before I knew it. I made another cake the next week and it disappeared before my eyes, with several of the girls asking me for the recipe.

I think this cake is one of those super easy cakes that you can chug out in about ten minutes, barring baking time. It doesn't really matter how you do it, as it all mixes up pretty much the same. The first time I made it like the method below, the second time I made it, I creamed butter and sugar together, then add the wet stuff together and then the dry. The second time was much denser and that was the only real distinction.

Sour cream, banana and walnut cake

Ingredients:
1 cup of brown sugar
1/2 cup aka 125g of butter
2 eggs 
250ml of sour cream
1 cup of mashed banana or two large bananas
1 2/3rd cup of plain flour
1 teaspoon of baking powder*
1 teaspoon of cinnamon*
1/2 cup of walnuts

*DrH is yelling at me via text message to add that I yolo sprinkle cinnamon and baking powder by sight.

All the things!
1. Set your oven to 160C. Line your favourite baking tray/cake tin, I favour my springform 16cm square tin. Cream your butter and sugar together until fluffy and pale!


Creaming butter and sugar is fun
2. Add in your cinnamon and mix again briefly.


Ahhh cinnamon, so tasty
3. Add your eggs in and mix!


Bright sunny eggs


It suddenly looks super liquid with eggs in
4. Sift in your flour and baking flour and mix!


Mix, mix!
5. Mash up your banana and once again, mix.


If you don't wanna wash up, just whack it in the bowl and mash it
6. Put in the banana and sour cream and mix once again.


So attractive
It gets better?
7. Don't forget to add in your walnuts until just combined. Don't remember last minute like I did haha.


Seriously don't let it get to this stage
8. Bake for about 45-60 minutes until it cooks through and a skewer comes back clean. Allow it at least 10 minutes to cool before slicing it, so it doesn't fall apart.

Wednesday, 19 March 2014

Coffee and walnut brownie

I winged this recipe for a mate's going away party. It was quite well received since it had a good combination of flavours, coffee and walnut, chocolate and coffee, chocolate and walnut, why not all the above?

Coffee and walnut brownie

Ingredients:
200g of dark chocolate
100g of butter
1-2 tablespoons of instant coffee or shots of expresso
2 eggs
1/2 cup of sugar
1/2 cup of chopped walnuts
1/2 cup of plain flour
1 teaspoon of baking powder
1 teaspoon of vanilla bean paste
Hot water


1. Melt the butter and chocolate in a bowl over a saucepan of hot water. Line a brownie tray with baking paper and set the oven to 150C.

I swear I have like five copies of this photo on my blog
2. Allow to cool for about 5-10 minutes, add in eggs, sugar, vanilla bean paste until just combined.

So glossy

3. Dissolve the coffee in bit of hot water and add to the mixture.

Shiny shiny
4. Sift in the flour and mix lightly until fully incorporated.

Nice and thick
5. Mix the walnuts into the brownie mixture or scatter them at the bottom of the pan before the brownie mixture goes on top.

This?

Or this?
6. Bake at 150C for an hour and allow to cool before slicing.

Saturday, 25 January 2014

Matcha Chiffon Cake

Do you know what the most definitive indication of a woman's weight loss is? That one thing that tells you, "geez you've lost a bit recently."

Visible collarbones? Nope.

A thigh gap? Nope.

An arse that defies gravity? Nope.

No periods? That fine anorexia down to conserve body heat? Yes, but that's gone way too far. I'm talking quick fix here, no one drops down to anorexia proportions and goes back up in a week or two.

It's actually a women's breasts that tend to shrink first when losing weight. Breasts are pure fat, so it only makes sense that when the body is lean and mean, the first place to go is the breasts and pretty much nowhere else. Sorry thighs and belly fat, this is a more permanent storage solution for the body, so this is often the last to go.

What does this story have anything to do with matcha chiffon cakes? Well one of the finer points of chiffon cakes is that the lightness is due directly to the huge amount of stiff peaks egg whites used as well as the lack of heavy fat. Chiffon cakes, unlike most cakes, is made without butter and instead only oil, water and a splash of milk are used to moisture to the cake. This makes for a very light, fluffy and delicate flavour rather than the rich buttery flavour you'd associate with most cakes.

With this being said, chiffon cakes are quite plain in flavour and are always flavoured with something else. This recipe is easily adapted to contain other flavours though, like orange zest, lemon zest, pandan, vanilla and whatever else you can think of.

My cakes fell a little flat because I don't have a high cake tin. Since this cake is so light and has no real substance, it needs a high walled cake tin to cling to to support itself. You can buy specially made chiffon cake tins and things but I've never seen one for sale ever. Despite the lack of cake tin, they still had a beautiful rise and were soft and fluffy. This is the recipe I originally used. I just messed with the proportions a bit for lazy baker inside all of us, it still worked.

When I measure out this matcha powder, I normally sift it a few times to get out the tougher bits of tea. I find myself using a fair bit of matcha powder to make this cake but the flavour is delicious. For the neutral flavoured oil, don't use olive oil, it makes the cake have a really odd flavour due to its strong flavour. Vegetable oil is normally my go to for oil in cakes.

Beating stuff into stiff peaks is honestly the hardest part of this cake. Not so hard if you've got a stand mixer, or are willing to wash yours. I did mine the old fashioned way with a wire whisk and did the traditional test of standing it over my head. Jubi drew me a picture because I made this cake once over Skype.


I freaked out several times attempting this


Matcha Chiffon Cake

Uses: unsweet cake for Asians to enjoy.

Ingredients for the cake:
5 large egg yolks at room temperature
3/4 cup of caster sugar
1/3 cup of neutral tasting oil
2 tablespoons of milk
2 tablespoons of water
1 scant cup of plain flour with 2 tablespoons of corn flour well sifted in, aka cake flour
1/4 teaspoon of salt
1 teaspoon of baking powder
25g of matcha green tea powder

Ingredients for the meringue:
5 large egg whites at room temperature
1/2 scant cup of sugar
Pinch of cream of tartar


All the usual suspects
Instructions:
1. Separate your eggs.


I should just reuse this photo constantly
2. Beat your egg yolks and sugar together until pale, thick and creamy.


Same for this photo
3. Start mixing in the oil a little bit at a time, while whipping vigorously. Very much like a mayonnaise. I don't know why I do this, you can just add it all in at once, I found it made only a small different to how fluffy the cake turned out.


Shiny, shiny oil

4. Mix in the water with the sugary mayo mixture.


5. Sift the crap out of your matcha green tea, flour and baking powder. I normally do this about three or four times depending on how lazy I feel. If there are any chunky bits of tea left behind, just throw them out.


One of the many siftings
The colour quickly evens out
6. Mix the matcha/baking powder/flour into the sugar mayo mixture. Start working on the meringue mixture and you will notice the mixture will start to turn a bit greener as the tea infuses.


Shiny/lumpy
7. Time to work on the meringue! Start whipping the egg whites vigorously.


Is this picture upside down?

8. When it hits soft peaks, add in the cream of tartar and start adding the sugar in a teaspoon at a time. Whisk vigorously after each addition.


Dump the sugar in!

9. You will notice the egg whites start to turn nice and shiny after the sugar. Once the egg whites hit stiff peaks, you are done.


This glossy

10. Fold the first third of the meringue into the matcha cake mixture. Fold carefully before folding the rest of the meringue.


Fold it in! Not with a whisk though!


First third!
11. Bake in a high walled 22cm cake tin at 180C for about 40 minutes, this cake doesn't turn golden brown. It really only get pale and springy when pressed down, do the skewer test and you should be sweet.


Last few thirds!


Give it a light tap and smooth out the top

Yeahhh do not use a bundt tin, that's not the same thing at all.


Whats the name of my blog again?
Oh and I didn't bother putting in pictures about the thigh gaps, collar bones or nice arse. Its actually quite NSFW/raunchy considering what I'm looking up, especially when you start venturing into thigh gaps and nice arses. If you need photos, you're already on the internet buddy, check out that stuff in your own time.

Thursday, 24 October 2013

Ethiopian Lentils and flatbread

Have you ever been so enamoured of your recipe that you crow about it to everyone you meet and continue to eat it for days on end? I'm the kind of person who can't eat the same meal more than twice in a row. I ate this lentil and flatbread recipe for a record nine days before I stopped. I can't eat Mama Pham's pho for any more than three MEALS in a row

I have no idea why I wanted to cook lentils, however the first recipe from one of my friends at work, S.,. She also gave me the mustard seeds for the recipe which also included cumin seeds, tumeric, tomato paste, onions, garlic, red lentils, stock and chilli. That seemed like a pretty easy recipe as I had all of that at home barring the lentils and the mustard seeds.

Of course when I went to cook the lentils, I found that my cumin seeds had gone missing, courtesy of VGirl when she was making falafels. Then the tumeric was gone from when we last made banh xeo, Vietnamese tumeric savoury crepes. Well that was me well and truly fucked, I'd have bailed but I had already pre-soaked my lentils and had no idea what to do with it.

I decided to be courageous and wing it with a spice mix. I had to choose between a powder madras curry or my new berbere spice mix that I had picked up. I went with the berbere, the premade one I had didn't have the ingredients listed but Wikipedia helpfully tells me that it usually has at least chili, garlic, onion, ginger, dried basil, Ethiopian cardamom, rue, nigella, fenugreek as well as ajwain or radhuni. I have no idea what Ethiopian cardamom, ajwain or radhuni taste or smell like, so there was no way I was going to try and make berbere from scratch. From the smell of it, mine has paprika and nutmeg in it too. Feel free to make your own if you want.

I actually can't remember what brand of berbere I got, except that I got it from Pennisi Cuisine, a whole sale deli store in Woolloongabba and they don't even have it on their website. Its comes in a little rectangular packet though . . .

Anyway, I also decided to make some flatbread with it. I stole Julie Goodwin's recipe for it, when I made it though, I made about 20? small pieces rather than 8 large ones. Each flatbread piece only ended up being about the size of my hand, a good 20cm or so in diameter. I prefer my flatbread quite thin and crispy though, so that might why I had so many.

I was very proud of both the lentils and the flatbread and made lots of people eat it at work. H., adores it, and I kept making her a little box of lentils and lots of flatbread to scoop it up with. Di really enjoyed the flatbread too and asked for the recipe. While K., who was on a bad financial stretch also vowed to cook this, until I took pity on her and made her a batch of sausage rolls to stretch it out until pay day haha. Oh Gill and I also do a dinner swap and she owes me a bag of lentils to cook her a batch.

Julie Goodwin's Flatbread

Uses: Bribing H., to do work for you.

Ingredients:
4 cups of flour
1 teaspoon of salt, 1 tablespoon if you're a salt fiend like me
100g of butter
375ml of milk, I used soy cause I never have normal milk handy
Cooking oil


Soy sauce is not involved
Instructions:
1. Heat the milk and butter together until the butter is just melted. I nuked mine in the microwave for about 30 seconds. Microwave strengths may change.
2. Sift the flour in a large mixing bowl with the salt and make a well in the centre. Gently mix until the dough comes together.


Like this

3. You should have a soft stretchy dough that doesn't stick to the board. If it does, continue to add flour until it stops being a pain. Knead for about 5 minutes until soft and stretchy.


Squishy
4. Cover and rest at room temperature for about 30 minutes or so.


Squish squish squish

5. Heat a large saucepan on a steady medium until hot, splash in some oil and begin step 5.
6.  Pinch off a blob and roll out as thinly as possible, lifting off the the board several times and rerolling until you are satisified. Throw in the pan, and start rolling out another piece while the flat bread cooks. It takes about a minute or so.
7. Once the surface begins to bubble and the edges curl slightly, flip over and continue playing around with your flatbread.


Rustic is a nice word for imperfect cooking

8. Continue frying flatbread until you have enough to eat for your meal.


So crunchy and buttery
Ethiopian lentils:

Uses: eating vegetarian for several days

Ingredients:
2 cups of uncooked red lentils
4 cups of water or stock
1 medium onion, finely diced
3-4 cloves of finely diced garlic
1 tablespoon of berbere spice
1 tablespoon of black mustard seeds
1/4 cup of water
400g can of diced tomatoes
1-2 tablespoons of tomato paste

Salt/pepper/sugar/chopped chilli to taste


Mmm lentils

1. Soak your lentils for about 30 minutes before cooking, also fine to cook straight from dried lentil. This recipe is very flexible. If you do decide to not soak the lentils, use an extra cup of water when cooking to compensate for water absorption. Chop up all your garlic and onion.


Lentils in stock!
2. Cook your lentils on a steady low simmer until soft and melting. While this is happening continue with the other steps.


Is it red yet? If so, done.

3. Put in a tablespoon of berbere spice and mustard seeds together in a hot saucepan. Stir until the mustard seeds begin to pop and smoke.


4. Add in the additional 1/4 cup of water and stir until the water has all evaporated again, this normally takes a minute or two. This gives the berbere and mustard paste additional time to cook. It gives it a really odd taste if you don't cook down the berbere paste so keep at it.


Lean away and turn on your exhaust fan


Pretty much done

4. Toss in the garlic and onion and cook until the onion has begun to brown and caramelise, 6-10 minutes.


Sorta hard to tell with the colour though

5. Blob in your tomato paste and cook for a few seconds to sweeten the mixture.


This is what you want
6. If you're brave, pour the lentils into the saucepan, if not, pour the spice mix into the lentils. If you go lentils into the saucepan, it will seize and spit at you for a bit, so have a lid handy.


Bubble bubble, toil and trouble!


Almost there!

7. Add the canned tomatoes and season. I normally add at least a tablespoon of sugar, salt and hot chilli powder. I prefer this curry a little sweeter to be honest and the spiciness of hot chilli cuts through nicely. Heat to simmer and allow to cook for a further 5-10 minutes, until the colour brightens and the lentils thicken slightly.


Delicious